How Much Does it Cost to Seal Coat a Blacktop Driveway

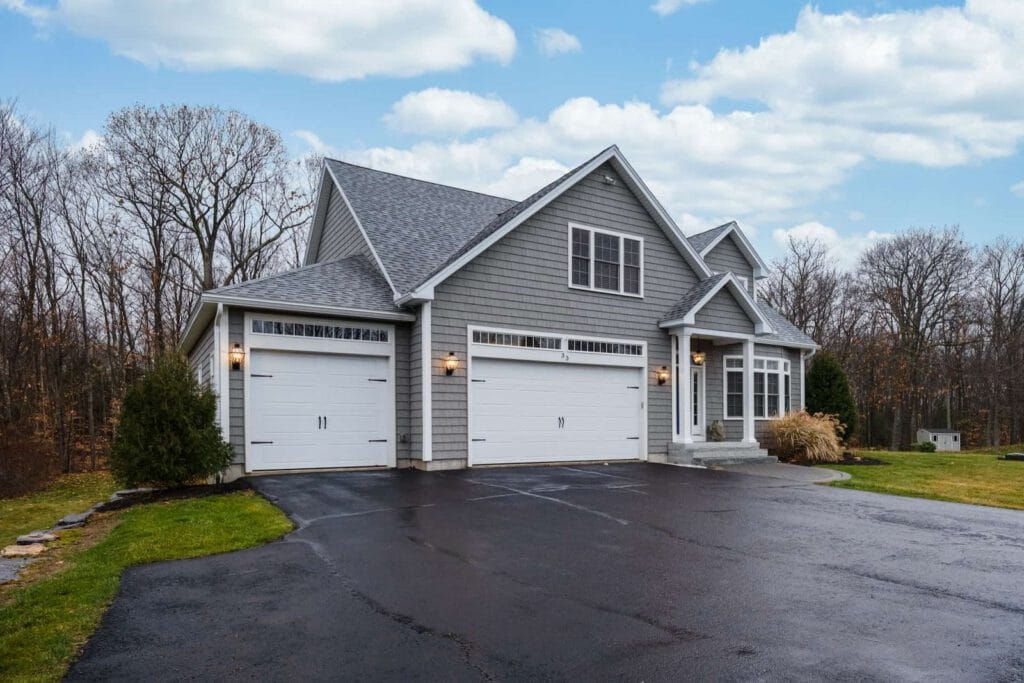
If you want to enhance the appearance of your home and protect your driveway from damage, then sealing your blacktop driveway is a must. With prices ranging from $110 to $1,500, depending on factors such as size and type of sealant or coating, the investment is well worth it.

By reading on, you’ll discover how sealing your driveway can add value to your property and protect your pavement from wear and tear, ultimately saving you money in the long run. Don’t wait any longer to take care of your home’s exterior – keep reading to learn more.

Why Seal a Blacktop Driveway?

Paving your driveway is an important part of keeping it in good shape. But over time, the surface can start to deteriorate and that’s where driveway sealing comes in. Driveway sealing is the process of applying a sealant to the surface for protection and longevity.

Having a properly sealed driveway means not only prolonging the life of your pavement but also protecting it from outside elements such as sun damage and snow.

This will help keep the integrity of the material intact while enhancing its curb appeal at the same time. It’s important to consider various aspects when looking into this option before making a final decision in order to weigh out whether or not it’s right for you and your budget.

Factors Affecting the Cost of Seal Coating

The dimensions of the driveway.

The size of your driveway is an important factor to consider when it comes to having it sealed. Most contractors charge for the job by the square foot and you can expect to pay between $1.25 and $1.50 per square foot for materials and labor. If your driveway measures only a few hundred feet, then you may end up paying more as many contractors have a minimum fee for projects like this.

If you’re looking to expand your parking space, then it’s worth noting that the cost of paving a parking lot averages around $75,000 depending on the size required.

Of course, there are likely to be other additional costs associated with such a large project such as site preparation, excavation work, and installation fees which need to be taken into account too. All in all, it’s best to estimate at least double the cost quoted if you’d like an exact idea of what a parking lot paving job will set you back.

Sealant type.

The type of sealant you choose is essential when it comes to its cost per square foot. You can find many different types in 5- or 55-gallon units, which provide 500 and up to 5,000 square feet of coverage respectively. The amount of coverage a particular sealant provides will depend on how thick or gooey the sealer is; generally, the thicker the sealer, the less it covers, but with a more durable finish. This means that in order to get maximum coverage for the best price, it’s important to find a balance between the mobility and consistency of your chosen sealant.

Sealants come in many different materials such as acrylics, epoxies, and polyurethanes; each one has its own unique characteristics such as resistance to UV rays or grease repellents.

It’s worth weighing up all these options before making a decision so you can get the most out of your purchase while ensuring long-lasting durability.

There are also specialist sealants available specifically designed for particular surfaces such as concrete or metal roofs so make sure you know what you need before investing in something that won’t be suitable for your application.

Do you need another seal coated?

For any homeowner, it is important to consider how to best protect and beautify their home. One of the most cost-effective ways of achieving this goal is by resealing areas such as driveways, concrete pathways, and patios.

Resealing these surfaces helps to ensure they resist water damage and retain their vibrant colors while also repelling toxins, dirt, and other substances that can degrade them over time.

Fortunately, many contractors offer resealing services at a minimum fee that gives homeowners great value for money.

Of course, if the area needing attention happens to be quite small – such as a single driveway – then there may be cost savings associated with sealing other areas at the same time in order to meet the contractor’s minimum fee.

This not only ensures that driveways, pathways, and patios are all adequately protected from environmental damage but also gets you better value for your money overall.

How many coats do you want?

Applying one coat of sealant to a driveway might seem like the most cost-effective approach, but for those with heavier vehicles or lots of regular traffic, it’s worth asking your contractor to add an additional coat.

This extra layer will provide added protection against wear, weather, and ground movement that can damage asphalt driveways over time.

And while the cost of sealing your driveway will certainly increase with two coats, it won’t double as much of the time-consuming work, such as cleaning and prepping the surface, was already done during the first phase.

Two coats are necessary in certain cases where more protection is needed. If you live in a place prone to cold winter temperatures or heavy summer rains – both of which can take a toll on asphalt driveways – then an additional layer of sealant should be considered.

The second layer helps repel water and keep out dirt and grime; this not only prolongs the life of your driveway but also keeps it looking fresher longer.

Plus, if your home gets visitors in cars or trucks daily, proper sealing is essential for ensuring those vehicles remain a safe distance from any potential damage and wear on the surface below.

Is your blacktop driveway badly damaged?

If you’ve been putting off resealing your driveway, chances are it has suffered damage like spiderweb cracks, pitting, craze cracks, or small holes. Fortunately, there are options available to address the damage.

A top coat will help extend the life of your asphalt driveway by at least 10 years, provided that it does not suffer from too much damage. Latex acrylic is a thicker and more durable sealant that can fix more serious issues.

The cost of this option is lower than having a brand-new driveway installed; however, it won’t suffice for more extensive damages such as fill-and-seal. Fill-and-seal is the most costly option for repairing damaged asphalt driveways but often yields the best results if extreme care is taken in the application.

Do you want to take your blacktop to next level?

Enhancing the look of your driveway can go a long way in boosting your home’s curb appeal. You can ask your contractor for an upgrade beyond just resealing it, with options like getting a design stamped into the sealcoat or even having it colored for something fun and unique.

Maybe you’d prefer to add some elements of elegance, such as pavers around the perimeter. Be aware that any additional services will cost more than just a standard sealcoat application, but it can definitely make all the difference in giving your property an instant boost in style.

When considering ways to enhance your property’s style, remember that revamping your driveway is one of them. A simple change can have a big impact on how others view your home and its surroundings.

If you’re interested in exploring further customization opportunities beyond a standard sealcoat, speak to your contractor and see what they suggest – be it a custom design or color scheme or incorporating pavers that give off an elegant vibe.

Make sure to know upfront what kind of investment you might be making, as fancier finishes won’t come free, but if done properly could provide excellent returns when it comes to admiration from passersby.

Average Costs for Seal Coating

Having a nice, sealed driveway adds to your property value and helps protect your pavement from the elements.

The cost of having your driveway sealed will depend on several factors including the size, type of sealant, and type of coating that you choose.

On average, sealing an asphalt driveway costs around $470 although prices can range from as low as $110 at the lower end up to as much as $1,500 at the top end.

The cost of sealing a driveway depends largely on its size since larger driveways require more materials and labor. Additionally, factors like what type of asphalt sealer or coating you’ll use also play a role in the final price.

You can choose between standard oil-based pavement sealers that last a few years or acrylic polymers that create an armor-like coating with lasting protection against harsh weather conditions and staining.

Ultimately, regardless of what materials you decide to use having your asphalt driveway sealed is worth investing in – it not only enhances curbside appeal but also keeps your pavement safe from wear and tears over time.

When is the best time to seal a driveway?

When it comes to maintaining the integrity of a driveway, sealing is an essential task. Not only does it help your driveway look more attractive, but more importantly it seals out water and prevents cracks from forming due to weathering.

It’s important to note that new driveways shouldn’t be sealed before they are at least 6 months old because the sealant will not properly bond to the surface otherwise.

The best time to seal a driveway is between spring and fall when the temperature is above 55 degrees and there is no rain in the forecast for 24 hours after the sealant is applied.

This allows enough time for the sealant to dry properly so that it can form a durable waterproof barrier against water and debris. Sealing during extreme temperatures can cause cracking or bubbling that may ruin your efforts in paving the perfect driveway.

Always remember to read any instructions related to temperature on product labels before attempting any work on your driveway.

DIY vs. Professional Seal Coating

When it comes to sealcoating a driveway or other asphalt surface, there are advantages to doing it yourself. The biggest benefit is that you don’t have to pay labor fees—you can save money by completing the task on your own.

Additionally, because you’re in charge of the entire process, you can make sure that the work meets your standards and that you use quality materials. It’s also a great opportunity for bonding with family members or neighbors who come together to help out with the job.

However, there are some risks associated with DIY sealcoating. Completing this type of project correctly requires certain skills and specialized equipment.

If done incorrectly, chances are that the sealcoat won’t last long and eventually crack or peel off. As a result, it would be necessary to hire a professional contractor at an extra cost down the line.

It is important to evaluate whether this kind of project is within your ability level in order to avoid any unnecessary problems later on.

Conclusion

Sealing your blacktop driveway is an investment that pays off in both curb appeal and pavement protection. While the cost of sealing a driveway can vary based on several factors, including size and type of sealant or coating, the benefits are clear.

Whether you opt for a standard oil-based sealer or a long-lasting acrylic polymer coating, taking care of your driveway will help maintain your home’s value and save you money in the long run. So don’t hesitate – to choose the best materials for your needs and start enjoying the benefits of a beautiful, protected driveway today.

Blacktop Driveway Maintenance: 7 Easy Tips From Paving Pros

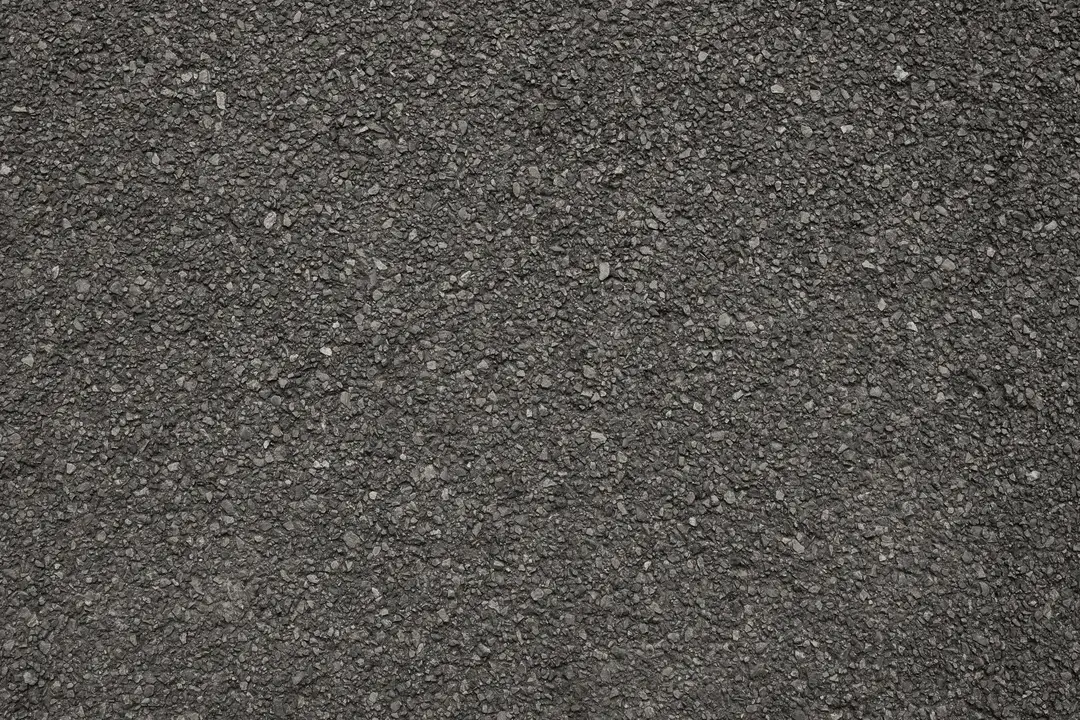
Blacktop Driveway Maintenance: 7 Easy tips from Paving prosAre you tired of your blacktop asphalt driveway showing wear and tear? Don’t let the beauty of your home’s exterior be compromised by a neglected driveway.

Blacktop maintenance may sound daunting, but with the right knowledge and tools, you can keep your driveway looking brand new for years to come.

In this article, we’ll look at the importance of blacktop asphalt maintenance, how to perform preventative maintenance on your own, and what it costs to repair or patch an asphalt driveway.

So let’s get started and learn how to preserve that perfect pitch-black shine!

What is Blacktop Asphalt?

Blacktop asphalt is constructed of concrete debris, pebbles, and petroleum. It’s a cost-effective choice for driveways, parking lots, walks, and other paved places.

It’s affordable and weatherproof, making it popular. Blacktop asphalt, often known as “asphalt pavement,” is used interchangeably with concrete for driveway installation and repair.

Blacktop driveways are affordable, low-maintenance, and can be sealed to last for years. In warmer climates, they are more weather-resistant than gravel or concrete.

Blacktop asphalt driveways are an affordable, durable alternative for any paved space.

What are the reasons for the deterioration of blacktop asphalt driveways?

Blacktop asphalt driveways are affordable and durable. Why do asphalt driveways degrade?

Material deterioration is the answer. Heat, cold, snow, rain, and other elements can degrade blacktop asphalt, composed of petroleum, concrete debris, and pebbles. Improper installation or maintenance can accelerate this process.

Visual inspections and appropriate drainage will help your blacktop asphalt driveway last longer. Seal coating every few years prevents moisture from entering the pavement and deteriorating it faster.

Fix driveway cracks and holes immediately using cold patch asphalt repair or hot asphalt. For a long-lasting driveway, utilize robust materials.

To preserve its longevity, your blacktop asphalt driveway needs annual maintenance and inspections.

Yet, proper maintenance can keep your driveway safe, lasting, and attractive.

Ready to learn about driveway maintenance?

Blacktop Preventative maintenance

Good news! Keeping your blacktop asphalt driveway in top condition doesn’t have to be a chore. With the right blacktop preventative maintenance plan, you can ensure that your driveway will remain safe, durable, and attractive for years to come.

The key to blacktop preventive maintenance is regular inspections and cleaning. Each month, take time to clean away surface debris (leaves, rocks, dirt, etc.) that can stain or damage your asphalt.

During this time, it is recommended to visually examine the condition of your asphalt and take action to remove any oil or difficult stains on your driveway.

You should also conduct regular seal coating every few years to help protect against moisture entering the pavement and causing it to break down more quickly.

Another important step is patching up any cracks or holes that may appear in your driveway with appropriate repair materials such as hot asphalt or cold patch asphalt repair. Finally, always use high-quality materials when installing a new driveway so that it lasts longer.

By following this simple preventive maintenance plan for blacktop driveways, you can ensure that yours remains safe and attractive for many years to come!

Following this preventive maintenance plan for your blacktop driveway is essential to ensuring that it remains safe and attractive for years to come.

Now, let’s learn more about the importance of conducting visual inspections to spot any potential issues with your driveway before they become a problem!

1. Conduct Visual Inspections

Conducting regular visual inspections of your asphalt driveway is an essential part of maintaining it.

This is because visual inspections can spot issues before they become too big to repair, such as cracks and holes in the pavement.

When conducting a visual inspection, look for oil stains, cracks, and other signs of damage.

If you find any, address them right away with the appropriate repair materials. Additionally, look for any areas that need to be sealed or patched up.

Also, make sure to inspect the edges of your driveway for any loose gravel or dirt that might have accumulated over time. If left untreated, this can lead to further damage down the road.

Finally, remember to check your driveway during both winter and summer months so that you’re not missing anything during your maintenance routine!

2. Check Sprinklers

If you have a sprinkler system, it’s important to check it every now and then to make sure that everything is working properly.

One of the most common issues with sprinklers is broken heads, which can lead to water damage on your blacktop driveway.

To avoid this problem, regularly inspect each head for any cracks or other signs of wear and tear.

If you notice any damage, replace the head as soon as possible. Additionally, make sure the sprinkler heads are not pointing in the direction of your driveway so that they don’t water unintentionally.

Finally, periodically check your irrigation system for any leaks that could be causing excess water to spill onto your driveway.

By checking your sprinklers often and making repairs when necessary, you can prevent damaging water buildup on your blacktop driveway and keep it looking its best!

3. Remove Weeds

Weeds growing on your blacktop driveway can be an eyesore, and can even cause damage if left unchecked.

To keep your driveway looking its best, it’s important to remove weeds as soon as you spot them.

The initial action is to apply herbicide to the weeds in order to eradicate the root system.

For small patches of weeds, you can use a bottle or sprayer with an herbicide specifically designed for asphalt driveways.

For larger patches of weeds, consider using a lawn mower or weed eater to cut them down before spraying them with an herbicide.

After spraying the weeds, wait for the product to take effect before removing them by hand or by using a shovel or rake.

It’s also important to fill in any holes left behind after removing the weeds with sand or gravel so that water won’t accumulate and cause further problems down the road.

By taking these steps and regularly inspecting your driveway for signs of new weed growth, you’ll be able to keep your driveway looking neat and tidy.

4. Seal & Repair Cracks

Asphalt driveways are subject to the harsh effects of Mother Nature, and cracks in your asphalt driveway can often be one of the first signs of deterioration.

It’s important to act quickly to seal and repair these cracks before they get worse and cause further damage to your driveway.

Fortunately, sealing and repairing cracks on a blacktop driveway is an easy DIY project that you can do yourself with the right materials.

You’ll want to start by cleaning the crack thoroughly with a wire brush or garden hose and then filling it with an asphalt cold patch repair material.

This material will help fill any gaps in order to create a strong bond between new and old asphalt layers.

Once filled, you’ll want to use an asphalt squeegee or trowel to smooth out the surface of the patch so that it blends seamlessly into the rest of your driveway.

Then all you need to do is wait for it to dry before running over the repaired area with an asphalt sealer for added protection against water penetration.

5. Make Sure To Use a High-Quality Asphalt Seal

When it comes to protecting your blacktop driveway from the elements, nothing beats a high-quality asphalt seal.

High-quality asphalt sealant can help protect against water penetration and UV rays, both of which can cause significant damage to your driveway over time.

Using a high-quality asphalt seal will also help prevent cracks from forming in the first place.

The sealant forms a protective barrier between the asphalt and whatever else may come into contact with it.

This helps keep the pavement strong and helps reduce the risk of any further deterioration or cracking.

Finally, regular sealing with a quality product will also help keep your driveway looking great for years to come.

Not only does sealing maintain its original appearance, but it also extends its life by helping to prevent any major repairs or replacements down the line.

So if you want your driveway to last, make sure you invest in a quality sealant!

6. Prevent Gasoline and Oil Spills

When it comes to protecting your blacktop driveway, one of the most important things you can do is to avoid gasoline and oil spills.

As we all know, asphalt is an oil-based material. So when gasoline or oil spills occur, it can significantly damage the surface of your driveway.

To prevent this from happening, make sure that any potential spills are taken care of as soon as possible.

If you notice any signs of a leak, clean it up immediately with absorbent materials and dispose of any remaining liquids properly.

It’s also important to check your car for any potential leaks before parking on your driveway each time.

Regular inspections can go a long way in preventing gas or oil from seeping into the surface and causing damage over time.

Additionally, ensure that all containers containing these liquids are tightly sealed at all times so that there’s no chance of them spilling or leaking onto your driveway.

7. Prevent and Eliminate Standing Water

It’s important to take measures to prevent and eliminate standing water on your blacktop driveway as it can lead to cracking and potholes.

Standing water can be caused by rainfall, snow accumulation, or gardening activities.

To avoid this issue, make sure that your driveway is properly graded so that there is sufficient drainage.

Additionally, you should inspect the area regularly for any signs of standing water and take action immediately if needed.

If necessary, you can use a squeegee to remove excess water from the surface of your driveway and sandbags to divert runoff away from it.

You may also want to consider adding a permeable material such as gravel or perforated pipe around the perimeter of your driveway to help absorb some of the water and improve drainage in certain areas.

By taking these steps and keeping an eye on your blacktop driveway, you’ll be able to ensure that it stays in good condition for years to come!

8. Protect Your Driveway Edges

Protecting your driveway edges is essential for ensuring that your blacktop driveway remains in good condition for years to come.

As mentioned earlier, the edges are the weakest part of the driveway and can easily crack or crumble if not properly maintained.

To help prevent this from happening, try not to drive on them as much as possible.

You can also help strengthen the edges by building up the soil near them so that it is slightly lower than the sides of your driveway.

This will allow for proper drainage and make it easier for grass to grow near them.

Additionally, you should perform a visual inspection of your driveway’s edges regularly and fill any small cracks with cold asphalt patches or hot asphalt when necessary.

With regular care and maintenance, you can ensure that your blacktop driveway looks great and lasts for many years!

Keep your asphalt driveway well-maintained.

Asphalt driveway maintenance is easy. Regular maintenance can keep your blacktop driveway looking great and lasting for years!

Regular maintenance should include a visual inspection of the entire driveway, especially the edges, which are the weakest and can crack or crumble if neglected.

When needed, fill small cracks with cold asphalt patches or hot asphalt.

To prevent weathering, apply asphalt sealant periodically.

Finally, watch for potholes and depressions that may require more extensive repairs.

Maintain your blacktop driveway for years with a few simple steps!

A well-maintained asphalt driveway lasts longer and looks better.

What is the cost of repairing or patching an asphalt driveway after proper maintenance?

What’s the cost of repairing or patching an asphalt driveway?

Patching or repairing an asphalt driveway can cost a lot depending on its size and complexity.

Cold patch asphalt can fill a small crack for $2 per square foot, while hot asphalt can fill larger potholes for $2–$4 per square foot.

To fix a small crack in the asphalt, a professional will charge $1 to $3 per linear foot.

Filling depressions or replacing large asphalt sections costs more.

Choose weatherproof materials for any repair.

Make sure your driveway has good drainage to avoid water damage. You can maintain and repair your blacktop driveway for years!

Maintaining your asphalt driveway is crucial, regardless of the repair.

Preparing The Driveway For Repairs

It’s important to get the driveway prepared before any repairs can begin, and this is especially true for asphalt driveways.

The first step is to thoroughly clean the area that needs to be repaired, making sure it’s free from dust, debris, vegetation, and water.

You can use a stiff-bristled broom or any other type of broom that you may have lying around in the garage.

Once the area is clean, you’ll want to inspect it visually for any cracks or damage that may need to be addressed.

Depending on where you live, warmer climates require more regular maintenance than colder climates due to the accelerated deterioration process of asphalt pavement over time.

In addition to regular cleaning and inspection, you’ll also want to apply an asphalt sealant every three years or so in order to keep your driveway looking its best and protected from weathering elements.

And as an added bonus, using an asphalt squeegee will help spread out the sealer evenly across your driveway!

So don’t let minor cracks turn into major problems – with a bit of proactive care and attention, preparing your driveway for repairs will ensure your blacktop driveway stays in top condition for many years!

Taking care of your driveway is an investment that pays off in the long run and will give you peace of mind for years to come.

Conclusion

Once you’ve completed the initial steps of cleaning and inspection, it’s time to finish up the job by addressing any necessary repairs.

Depending on the severity of cracks or damage, repair materials such as cold patch asphalt, hot asphalt, and durable concrete may be needed.

If you ever feel unsure about how to properly install these materials, don’t hesitate to consult a professional for assistance!

Finally, make sure your driveway is properly drained before applying any sealants or final coatings. This will ensure that your driveway lasts longer and remains to look great for years to come.

Taking care of your blacktop driveway doesn’t have to be difficult or expensive – with a bit of know-how and some basic preparation steps, you can keep your driveway in top condition with minimal effort!

Common New Asphalt Driveway Problems: How to Identify, Prevent, and Fix Them

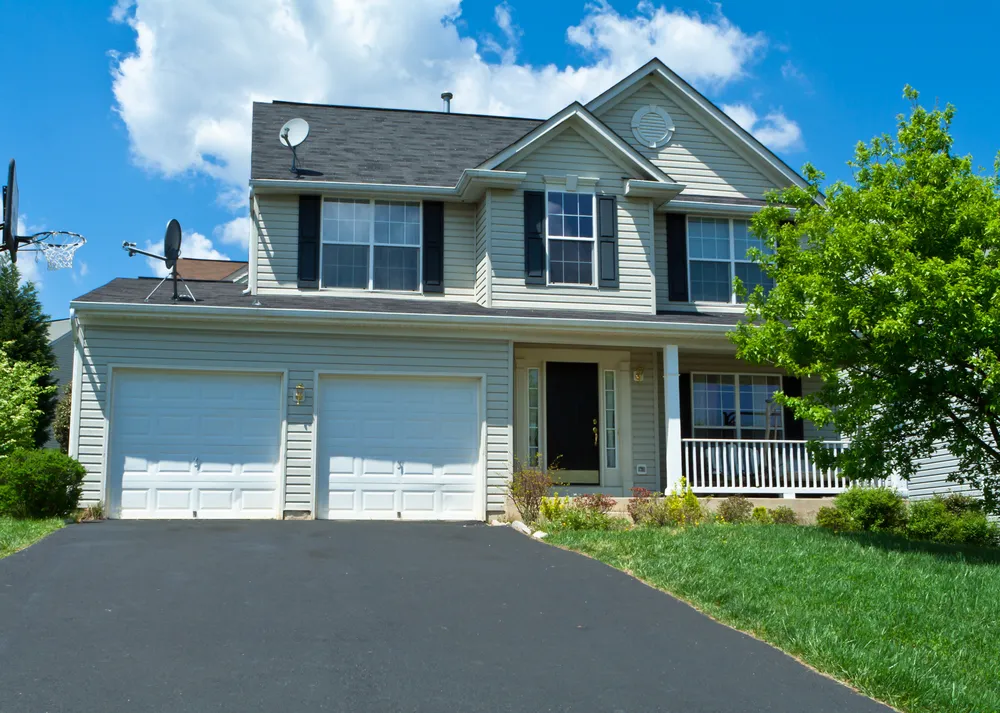
As a homeowner, you may be considering installing a brand-new asphalt driveway as a dependable and affordable paving option. However, even the best-laid driveways can experience major issues over time.

In this blog post, we’ll discuss seven common asphalt paving issues that can occur in new asphalt residential driveways and tips on how to address them, so your driveway will be in excellent condition for years to come.

Problem #1: Alligator Cracks

Cracks are caused by harsh weather conditions or heavy traffic driving off the side of the asphalt pavement causing edge crackings.

To prevent Alligator cracking, ensure proper compaction during installation and maintain a consistent thickness throughout. If cracks do appear, fill them promptly to avoid further damage.

How to fix a cracking driveway

Fill any existing cracks with a crack sealer and use an asphalt patch or a cold mix asphalt to fill larger areas of damage.

Problem #2: Potholes

Potholes form when standing water seeps into small pavement cracks and the expansion of water during freeze-thaw cycles. Not fixing potholes can cause damage to vehicles and rack up costly repairs.

water damage is a leading cause of asphalt damage and potholes.

To prevent potholes, ensure proper drainage to prevent water pooling and fill any cracks as soon as possible. If potholes do form, repair them immediately before they become safety hazards.

How to patch a driveway pothole

The steps below should be followed to repair a pothole in your driveway:

  1. Take out the trash: Get rid of any loose gravel, dirt, or stones from the area around the pothole and the surrounding ground.
  2. Identify the pothole’s depth: To gauge the pothole’s depth, use a level or straightedge.
  3. Fill the divot: Fill the pothole with patching material, such as asphalt patching compound.
  4. Compact the patching material: Use a tamper or other tool to compact the patching compound and make sure it is level with the surrounding area.
  5. Apply a sealcoat: Seal the driveway to protect the patching compound and prevent future damage.
  6. Give it time to cure: Depending on the product you used, the manufacturer’s instructions for curing time may differ.
  7. Driveway resurfacing: To get a smooth, even driveway, you may need to resurface it.

Looking for a professional asphalt contractor to take care of your asphalt surfaces?

Look no further than Nathan’s Paving! Our experienced team is equipped to handle any asphalt driveway issues you may be facing, from cracks and potholes to complete resurfacing.

We guarantee fair pricing and high-quality work.

Don’t wait any longer to fix those pesky asphalt issues – contact Nathan’s Paving today and let us take care of it for you!

Problem #3: Fading

Fading is caused by exposure to sunlight and other elements and can make your driveway look less attractive over time.

How to prevent your driveway from fading

  1. Maintain it: Cleaning your driveway on a regular basis can help stop the accumulation of dirt and grime that can cause fading.
  2. Avoid using harsh chemicals: Harsh chemicals, such as bleach or ammonia, can damage the surface of your driveway and contribute to fading. Use mild detergents and cleaners instead.

Problem #4: Rutting

Rutting occurs when heavy vehicle traffic or poor installation causes depressions in the asphalt surface.

To address rutting issues ensure proper grading and compaction during installation or consider adding additional layers of fresh asphalt if required.

How to address rutting

  1. Debris removal: Remove any loose stones, dirt, or gravel from the surface of the driveway.
  2. Determine the depth and extent of the rutting: Use a level or straightedge to measure the depth of the ruts and to determine how far they extend.
  3. Fill the ruts: Use a patching compound, such as asphalt patching compound, to fill the ruts. Follow the manufacturer’s instructions for mixing and applying the product.
  4. Smooth the surface: Use a trowel or other tool to smooth the surface of the patching compound and make sure it is level with the surrounding area.
  5. Allow time to cure: Follow the manufacturer’s instructions for the curing process, which may vary depending on the product you used.
  6. Consider resurfacing the driveway: If the rutting is severe or widespread, it may be necessary to resurface the driveway to create a smooth, even surface.
  7. Improve drainage: Address any drainage issues that may be contributing to the rutting, such as installing a drainage system or grading the driveway to slope away from your home.

Problem #5: Bleeding

Bleeding is caused by excess asphalt binder in the mix rising to the surface of the pavement creating slick surfaces that can damage vehicles. To address bleeding issues apply sand or other absorbent materials to the surface as needed.

How to fix

  1. Wait for cooler weather: The bleeding may stop on its own as the weather cools down.
  2. Debris removal: Remove any loose debris, dirt, or gravel from the surface of the driveway.
  3. Apply sand: Sprinkle a layer of sand on the surface of the driveway to absorb the oils and prevent them from bleeding.
  4. Wait for the sand to absorb the oils: Leave the sand in place for several days to allow it to absorb the oils.
  5. Remove the sand: Use a broom or leaf blower to remove the sand from the surface of the driveway.
  6. Apply a seal coat: Apply a seal coat to the surface of the driveway to prevent future bleeding and to protect the surface from damage.

Remember, prevention is key to avoiding bleeding driveways. Ensure that your driveway is properly installed and do regular maintenance.

Try to avoid parking heavy trucks or equipment on the surface for extended periods of time during the hot summer months.

Problem #6: Low spots

Low spots can form due to improper grading or compaction during the asphalt driveway installation process resulting in poor drainage and increased wear on tires. To fix low spots yourself, you’ll need some basic tools or hire a professional to help with drainage installation.

How to fix low spots in your driveway

Fixing low spots in your driveway will depend on the size and severity of the uneven surfaces. Here are some steps you can take to fix depressions in Asphalts in your driveway:

  1. Clean the area: Before beginning any asphalt driveway repairs, make sure to clean the area of any loose gravel, dirt, or loose asphalt.
  2. Fill the low spot: If the depression is shallow, you can fill it with a cold patch asphalt mix. Pour the mix into the depression and spread it evenly with a shovel or rake. Make sure to compact the mix with a tamper or your foot to ensure it is level with the rest of the driveway.
  3. Add more layers: For deeper depressions, you may need to add more layers of the cold patch mix. Apply the first layer, let it dry, and then add more layers until the depression is filled.
  4. Use a hot mix asphalt: If the depression is too large or severe for a cold patch mix, you may need to use hot asphalt. This process involves heating the asphalt and then pouring it into the depression. This should be done by a professional.
  5. Sealcoat: Once the asphalt repairs are complete, you should apply asphalt sealer to the entire driveway to protect it from further damage.

It is important to note that repairing low spots in your driveway is a temporary solution. Over time, your driveway may develop more depressions, and it may be necessary to repave the entire driveway. contact a paving professional for more help.

Nathan’s Paving offers professional asphalt paving services that are second to none. With our team of experienced and skilled professionals, you can expect nothing but the highest quality asphalt paving for your project.

Whether you need a new driveway, parking lot, or any other asphalt paving project, we’ve got you covered. Trust us to deliver high-quality asphalt paving that will stand the test of time.

Problem #7: Oil Stains

Alligator Cracks in an asphalt driveway

Oil stains on your driveway can be unsightly and difficult to remove. Here are some steps you can take to clean oil stains from your driveway:

  1. Absorb the excess oil: Use a clean cloth or paper towels to absorb as much of the excess oil as possible.
  2. Use a degreaser: Use a commercial degreaser to clean up the stain.
    Follow the instructions from the degreaser’s maker for how to apply it and how long to let it sit.
  3. Scrub the area: Use a stiff-bristled brush to scrub the stained area. Scrub in a circular motion to lift the oil from the surface. You may need to apply more degreaser and scrub a few times to completely remove the stain.
  4. Rinse the area: Use a hose or pressure washer to rinse the area thoroughly. Make sure all the degreaser and oil residue are removed.
  5. Repeat if necessary: If the stain is still visible, repeat the process until the stain is removed.
  6. Prevent future stains: To prevent future oil stains, consider placing a drip pan under your vehicle to catch any oil leaks. You can also sealcoat your driveway to help repel oil and other stains.

Note: Be sure to properly dispose of any oil or degreaser that you use, as they can be harmful to the environment.

Conclusion

proper maintenance is crucial for ensuring the longevity of your new asphalt driveway – if you notice any of these issues with your own driveway then take appropriate action before it’s too late!

From using hot asphalt to sealcoating, there are many steps you can take to keep your driveway looking great for years to come.

Have questions about your asphalt driveway?

Looking for an asphalt professional who goes the extra mile to ensure your asphalt maintenance needs are met at an affordable price?

Look no further than Nathan’s Paving!

Our team of experienced professionals is equipped to handle any potential issues that may arise with your asphalt surfaces, and we always strive to keep additional costs to a minimum.

Plus, we’re happy to provide a free estimate so you can see for yourself just how affordable our services can be.

Don’t wait any longer to give your asphalt the attention it deserves – contact Nathan’s Paving today!