You want to know how to properly seal your asphalt surface. Well, buckle up and get ready for a detailed journey through the asphalt sealing process.
We’ll take you step by step, from preparing the surface to the final inspection and maintenance tips. This article will provide you with all the technical and precise information you need to understand and master the art of asphalt sealing.
Let’s dive in and make your pavement shine like new!
Key Takeaways
- Preparation and cleaning is crucial before starting the asphalt sealing process.
- Crack and pothole repair should be done before applying the sealant.
- Applying a primer coat is necessary for the proper adhesion of the sealant.
- Rolling and curing the sealant is important for its effectiveness and longevity.
Preparing the Asphalt Surface
To prepare the asphalt surface for sealing, you’ll need to remove any debris and clean the area thoroughly. This is an essential step in ensuring a successful asphalt surface repair.
Start by clearing the area of any loose dirt, rocks, or vegetation. Use a broom or brush to sweep away any remaining debris.
Next, thoroughly clean the surface using a pressure washer or a hose with a high-pressure nozzle. This will remove any dirt, oil, or other contaminants that can interfere with the adhesion of the sealant. Pay special attention to any stains or spots and use a degreaser or detergent to remove them.
Once the surface is clean and free of debris, it’s ready for further surface preparation techniques.
Cleaning and Removing Debris
First, clear the area of any loose dirt, rocks, or vegetation. This step is crucial to ensure a clean and smooth surface for the asphalt sealing process. To effectively clean and remove debris, you can use sweeping equipment or pressure washing. Here are five important things to keep in mind during this process:
- Use a high-quality broom or sweeper attachment to remove loose dirt and debris from the surface.
- Pay close attention to cracks and crevices, as they tend to accumulate dirt and debris.
- If there are any stubborn stains or sticky substances, consider using a pressure washer with a suitable detergent to remove them.
- Avoid using excessive pressure when pressure washing to prevent damaging the asphalt surface.
- Make sure the area is completely dry before proceeding to the next step to ensure proper adhesion of the sealant.
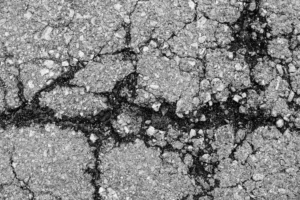
Filling Cracks and Potholes
To effectively fill cracks and potholes, you’ll need to assess the extent of the damage and choose the appropriate repair method.
Repairing asphalt is crucial in preventing further damage and ensuring the longevity of your pavement.
For cracks that are less than a quarter-inch wide, you can use crack sealants. These are designed to penetrate and fill the crack, preventing water from seeping in and causing more damage.
For larger cracks and potholes, you’ll need to use an asphalt patching material. This material is specifically formulated to adhere to the existing asphalt and create a smooth and durable surface.
Before applying any repair material, it’s important to clean the area thoroughly and remove any loose debris or vegetation.
Applying Primer Coat
You will need to apply a primer coat before sealing the asphalt. The primer coat is a crucial step in the asphalt sealing process as it prepares the surface for the sealant application. Here are some important points to consider:
Primer application techniques:
- Ensure the asphalt surface is clean and free from any debris or loose materials.
- Use a sprayer or a brush to apply the primer evenly.
- Apply the primer coat at the recommended thickness for optimal results.
- Allow the primer to dry completely before proceeding with the sealant application.
- Follow the manufacturer’s instructions for the specific primer product you’re using.
Benefits of using a primer coat:
- Enhances the adhesion between the asphalt surface and the sealant.
- Extends the lifespan of the sealant by providing a stable base.
- Helps prevent water infiltration and damage to the underlying layers.
- Improves the overall appearance of the sealed asphalt.
- Increases the durability and effectiveness of the sealant.
Spreading the Sealant
Now, spread the sealant evenly over the primed asphalt surface. Applying the sealant evenly is crucial for a successful asphalt sealing process. This step ensures proper adhesion and creates a protective barrier that extends the life of the pavement. To help you understand the process better, here is a table that outlines the steps involved in spreading the sealant:
| Step | Description |
|---|---|
| 1 | Start at the furthest point from the exit and work your way back. |
| 2 | Use a squeegee or a sprayer to apply the sealant. |
| 3 | Maintain a consistent thickness of the sealant throughout the surface. |
| 4 | Overlap each pass slightly to ensure complete coverage. |
| 5 | Pay extra attention to areas prone to water pooling or excessive wear. |
Rolling and Compacting the Sealant
After spreading the sealant evenly, the next step in the asphalt sealing process involves rolling and compacting the sealant. This step is crucial to ensure a smooth and durable surface. Here are five important aspects to consider during the rolling and compacting process:
- Rolling equipment: High-quality rolling equipment, such as a vibratory roller or a pneumatic roller, is used to apply pressure and compact the sealant effectively.
- Sealant application: The roller should be equipped with a suitable drum size to ensure proper coverage and compaction of the sealant.
- Overlap: It’s essential to overlap each pass of the roller to ensure uniform compaction and avoid any gaps or unevenness in the sealant application.
- Speed: The speed of the roller should be adjusted according to the specifications provided by the manufacturer to achieve the desired compaction level.
- Number of passes: The number of passes required may vary depending on the type of sealant and the condition of the asphalt. It’s important to follow the recommended guidelines to achieve optimal results.
Curing and Drying Process
During the curing and drying process of the asphalt sealing, it’s important to allow sufficient time for the sealant to fully set and harden. The curing time for asphalt sealant can vary depending on several factors, such as the type of sealant used and the ambient temperature.
Generally, it’s recommended to wait for at least 24 to 48 hours before allowing any traffic on the newly sealed surface. This allows the sealant to properly bond with the asphalt and reach its maximum strength.
Temperature requirements also play a crucial role in the curing process. It’s essential to apply the sealant when the temperature is between 50°F and 85°F to ensure optimal curing. Extreme temperatures can affect the curing process and may result in a lower-quality seal.
Therefore, it’s vital to consider the curing time and temperature requirements to achieve a durable and long-lasting asphalt seal.
Final Inspection and Maintenance Tips
To ensure the longevity and effectiveness of your newly sealed asphalt surface, it’s important to perform a final inspection and follow these maintenance tips. Here is a checklist to help you with your final inspection:
- Visual Inspection: Carefully examine the entire surface for any cracks, potholes, or areas that didn’t receive adequate coating. These issues should be addressed promptly to prevent further damage.
- Cleanliness: Keep the surface clean by regularly sweeping away debris and removing any oil or chemical spills. This will help maintain the integrity of the sealant.
- Regular Maintenance: Schedule periodic resealing to protect against wear and tear. This will help extend the life of your asphalt surface.
- Avoid Heavy Traffic: Limit heavy vehicles and equipment on the surface, as they can cause premature deterioration.
- Prompt Repairs: Address any issues promptly to prevent them from spreading and compromising the long-term durability of the asphalt.
Conclusion
To conclude, the asphalt sealing process is a crucial step in maintaining the durability and longevity of your pavement. By following the steps of preparing, cleaning, filling, applying, spreading, rolling, and curing, you can ensure a solid and protected surface.
Regular inspections and maintenance will further enhance the effectiveness of the sealant.
Remember, a well-sealed asphalt surface is the key to preserving its integrity and withstanding the test of time.