Prep your asphalt driveway NOW—before winter destroys it. Inspect cracks wider than 1/8 inch and seal them with hot-pour filler above 50°F. Sweep debris and blast oil stains with degreaser. Apply sealcoat in early fall using 0.10–0.15 gallons per square foot. Grab plastic-bladed shovels and magnesium chloride de-icer—skip rock salt completely. Set snowblower blades 1/2 inch above pavement. These five moves stop freeze-thaw damage cold. Stick around for the complete breakdown that’ll overhaul your driveway strategy.
Key Takeaways
- Inspect and repair cracks wider than 1/8 inch with hot-pour filler before winter arrives.
- Clean debris and oil stains thoroughly to prevent freeze-thaw damage and moisture trapping.
- Apply sealcoat in late summer or early fall when temperatures exceed 50°F consistently.
- Use plastic-bladed shovels and snowblowers set 1/2 inch above pavement to avoid surface damage.
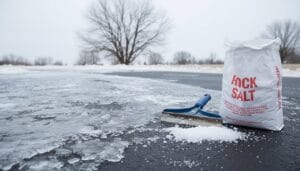
- Choose calcium chloride, magnesium chloride, or calcium magnesium acetate; avoid rock salt completely.
Inspect and Repair Cracks Before Winter Arrives
Inspect your entire driveway for cracks wider than 1/8 inch. Remove dirt and debris using a wire brush and compressed air. This guarantees proper sealant adhesion.
Fill Those Cracks Now
Apply quality hot-pour or polymer-modified crack filler before winter arrives. Schedule repairs when temperatures stay above 50°F for proper curing. Regular maintenance can extend driveway lifespan and prevent costly repairs in the future.
Document Everything
Take before-and-after photos. Get a professional estimate. Early repair costs a fraction of full replacement! Act now—your wallet will thank you later.
Clear Debris and Remove Oil Stains From Your Driveway
You’ve got to sweep up that mess before winter hits hard.
Why This Matters
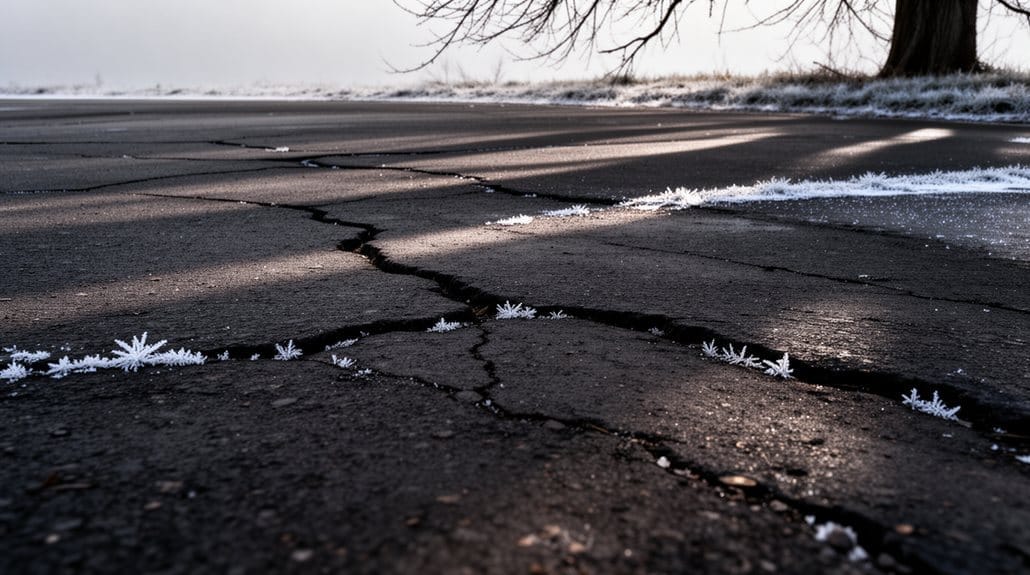
Organic debris traps moisture against your asphalt driveway. This accelerates freeze-thaw damage when temperatures drop. Don’t let leaves and dirt linger!
Fresh Oil Stains
Act fast! Absorb them with cat litter or sawdust. Let it sit for several hours. Then sweep up completely before the stain penetrates deeper.
Set-In Stains
These need serious cleaning. Scrub with a commercial degreaser or trisodium phosphate mixed with hot water. Rinse thoroughly and dry completely.
Before Sealcoating
Remove ALL oil and grease first. Petroleum contamination prevents proper sealant adhesion. Your sealcoating will fail otherwise!
Pro Tip
Photograph cleaned areas now. Compare them in spring to catch any freeze and thaw damage early. Better drainage prevents future problems! Having a well-maintained asphalt surface enhances the lifespan of existing pavement and reduces the need for costly repairs.
Apply a Fresh Sealcoat to Block Moisture
Sealcoating is your driveway’s armor against winter’s worst damage. Here’s why it matters for asphalt driveways.
The Timing Matters
Schedule sealcoating in late summer or early fall. You need several weeks for complete curing before freezing temperatures arrive. Don’t wait until October!
Before You Apply
Clean the surface thoroughly first. Sweep debris. Remove oil stains. Pressure-wash if needed. Let everything dry completely. This guarantees proper adhesion.
Fix Problems First
Fill and repair cracks before sealcoating. Unaddressed damage traps moisture underneath. That causes freeze-thaw expansion damage you can’t undo.
Choose Quality Sealcoat
Use high-quality asphalt emulsion rated for cold climates. Apply 0.10–0.15 gallons per square foot. Follow manufacturer instructions exactly.
Perfect Conditions
Wait for temperatures above 50°F. Make certain no rain for 24–48 hours. Your sealcoat needs time to cure properly and prevent snow and water damage successfully. Additionally, using top-grade materials enhances the durability and effectiveness of the sealcoat against harsh winter conditions.
Choose the Right Tools for Safe Snow Removal
Now that your driveway’s sealed and protected, it’s time to grab the right gear.
Your equipment choices directly impact your asphalt’s longevity.
Here’s what matters:
- Plastic or rubber-bladed shovels prevent surface damage during snow removal.
- Multi-stage snowblowers reduce aggressive scraping on larger driveways.
- Smart de-icing products protect asphalt year-round.
Use push-style shovels with light, layered passes. This technique reduces force on pavement and prevents catching edges in cracks.
Set snowblower blades at least ½ inch above pavement. Adjustable-height models work best here.
Skip rock salt completely. Instead, choose magnesium chloride or calcium chloride for de-icing. These options damage asphalt far less at low temperatures.
Keep sand or kitty litter handy for traction. Your drainage systems stay cleaner too.
Regular maintenance services, such as asphalt sealcoating, can help extend the life of your driveway.
Select Asphalt-Friendly De-icing Agents

| De-icer Type | Best For Your Driveway |
|---|---|
| Calcium chloride | Works down to -13°F effectively |
| Magnesium chloride | Gentler on asphalt pavement |
| Calcium magnesium acetate | Most eco-friendly option available |
| Rock salt | Avoid it completely |
Smart application wins the game.
Pre-treat lightly before snow arrives. This prevents ice bonding and reduces needed amounts. Excessive de-icers attract moisture and accelerate freeze-thaw damage.
Better alternatives exist!
Skip chemicals near landscaping. Use clean sand or non-clumping kitty litter for traction instead. These provide grip without attacking your asphalt pavement chemically. Regular sealcoating can also enhance your driveway’s durability against harsh winter conditions.
Your driveway will thank you for choosing wisely!
Conclusion
Here’s the kicker: driveways that aren’t sealed crack 40% more during winter freeze-thaw cycles. You’ve now got the complete playbook to protect yours. You’ve inspected cracks. You’ve cleared debris. You’ve sealed it up. You’ve picked smart tools. You’ve chosen the right de-icers. Your driveway’s locked and loaded for snow season. That’s serious preparation right there!