Oil destroys asphalt fast—don’t wait! Oil softens your asphalt binder within months, turning solid pavement into crumbly mush. Act immediately: blot fresh spills with cat litter or baking soda overnight, then scrub with dish soap and water. For tough stains, pressure wash at 3000 PSI. Seal within weeks to protect. Skip DIY if damage spreads beyond 10–20% of your driveway—professionals handle decontamination and overlays. Prevention wins: use drip pans, fix leaks promptly, sealcoat every 2–4 years. Understanding each solution unveils your best defense strategy.
Key Takeaways
- Oil rapidly softens asphalt binder, causing aggregate loosening and structural failure within months if untreated.
- Fresh oil stains respond to immediate treatment with cat litter, dish soap scrubbing, or pressure washing.
- Never sealcoat over contaminated surfaces; professionals must decontaminate through milling, chemical cleaning, or torch treatment first.
- Prevent oil damage by using drip pans, rotating parking spots, and fixing vehicle leaks promptly.
- Apply sealcoat every 2–5 years after contamination removal to extend pavement life and restore appearance.
Why Oil Destroys Asphalt (And How Damage Spreads)

When motor oil hits your asphalt binder, it softens it. Fast. Your pavement loses its grip within months.
How Damage Spreads
Softened binder means aggregate particles loosen up. Raveling starts—tiny pits appear everywhere. Water sneaks through cracks and accelerates destruction.
The Timeline You Need to Know
Soft spots develop that you can scrape with a screwdriver. Give it 6–12 months without action? You’re looking at structural damage.
Why Prevention Matters
Without proper preventive maintenance and sealcoats applied correctly, oil contamination ruins bonding. Your overlay fails. The cycle repeats endlessly, costing you serious money.
Act fast. Oil stains aren’t cosmetic issues—they’re structural emergencies waiting to happen. Our experienced team offers sealcoating services and preventive maintenance to protect and extend pavement life.
DIY Removal Methods for Fresh Oil Stains
You’ve got a narrow window here. Act fast! Fresh oil stains are way easier to remove oil stains than old ones. Speed matters tremendously for your asphalt driveway.
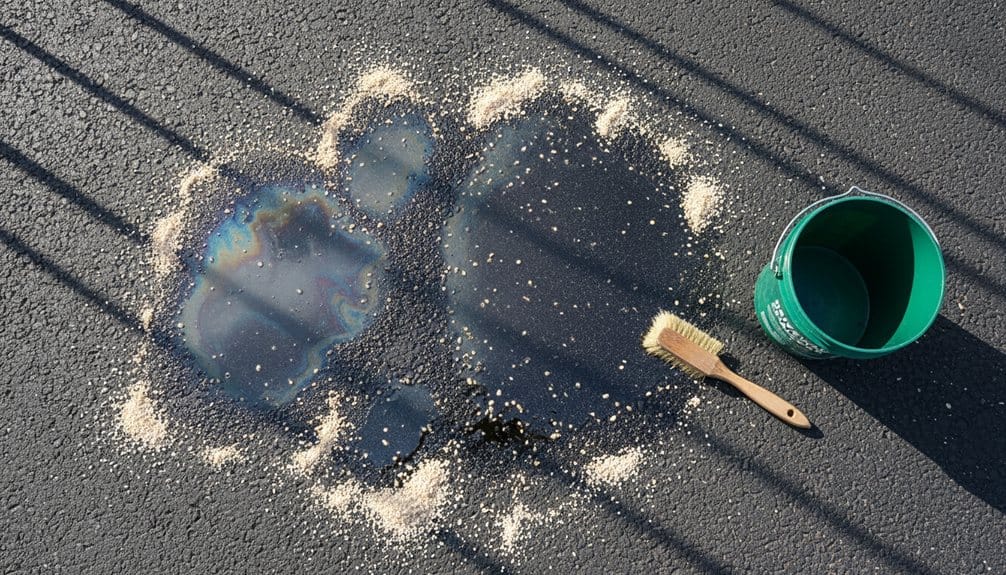
The Quick Blot Method
Immediately blot excess oil using cat litter or baking soda. Let it soak overnight. This absorbs the nastiest stuff before it penetrates deeper. Then sweep it away completely.
| Method | Time | Best For |
|---|---|---|
| Cat litter absorption | Overnight | Fresh spills |
| Dish soap scrubbing | 30-60 min | Light stains |
| Pressure washer (3000 PSI) | 15-30 min | Tough stains |
The Soap Attack
Apply generous dish soap. Add water. Scrub hard with stiff brushes. Wait 30-60 minutes. Rinse with your pressure washer. Repeat if needed!
Nathan’s Paving & Seal Coating recommends applying a high-quality sealcoat promptly after cleanup to protect and extend the life of your driveway, reflecting their commitment to durable materials.
Finish Strong
Apply sealcoat within weeks. Protect your asphalt driveway from future damage!
When to Call a Professional Contractor
DIY methods work great for fresh spills. But some situations demand professional skill.
Stage Two Damage Requires Pros
You’ll need a professional contractor when oil stains in asphalt show real damage. If you can scoop up material with a screwdriver or feel sticky softness underfoot, the binder’s compromised. That’s Stage Two—and it’s beyond DIY territory.
Other Red Flags
Extensive stains covering over 10–20% of your driveway need professional attention. Multiple high-traffic spots signal deeper problems. Repeated cleaning attempts that haven’t worked? Time to call specialists.
Before Sealcoating
Never sealcoat over contamination! Oil prevents proper bonding. Professionals test surfaces, remove impaired material, and recommend milling or patching first.
Structural repairs plus cosmetic work? That’s contractor territory. Protect your asphalt maintenance investment wisely. Our team services Central PA communities and can provide a no-cost, no-obligation estimate to assess the damage.
Professional Repairs: Resurfacing and Overlay Solutions
Once oil damage goes deep, your contractor’s got serious restoration options.
Milling and Overlay Magic
Your contractor mills off the top 1–2 inches. This removes surface contamination efficiently.
Then they apply fresh hot-mix asphalt overlay. This works great when underlying layers stay sound.
You’ve restored your asphalt pavements without full reconstruction costs!
Full-Depth Replacement
Heavily contaminated areas demand saw-cutting and complete removal.
Your contractor removes all affected material and cleans the base thoroughly.
New hot-mix asphalt gets installed at full depth.
This prevents recurring failure and protects your investment long-term.
Critical Pre-Repair Step
Before any resurfacing or sealcoat application, decontamination is essential.
Chemical degreasing or torch cleaning removes residual oil.
This prevents overlay delamination and guarantees lasting repairs.
Skip this step and your patches fail fast!
We also ensure meticulous groundwork and ground preparation to maximize durability before any resurfacing.
Seal Coating: Your Best Defense Against Future Stains

- Provides powerful oxidation protection
- Restores that stunning black appearance your driveway deserves
- Stops oil stains before they start with preventative barrier defense
The Smart Application:
You’ll apply sealcoat every 2–5 years on clean, dry pavement.
A proper 1/16–1/8 inch wet film requires 24–48 hours curing time before traffic returns.
Critical Truth:
Fresh oil spots must get treated first.
Oil prevents sealcoat bonding from working effectively.
Sealcoating converts driveway maintenance from stressful to simple.
You’re fundamentally investing in peace of mind and preventing future stains permanently!
Nathan’s Paving & Sealcoating brings local expertise and proven results to every project.
Preventing Oil Stains: Best Practices Before Damage Starts
You must absorb fresh drips immediately with rags or oil-absorbent pads. Don’t delay! Waiting increases oil penetration into asphalt binder.
Use Smart Parking Strategies
Park vehicles on a drip pan consistently. Rotate parking spots regularly to prevent concentrated staining. This stops binder softening before it starts.
Fix Leaks Now
Oil leaks from engines and transmissions cause heavy-duty stains. Fix them promptly! Use routine vehicle maintenance to catch problems early.
Keep Supplies Ready
Stock a driveway degreaser and stiff brush nearby. Pre-treat fresh spills within 24 hours using these tools. You’ll prevent chemical bonding with asphalt.
Prevention wins every time. Regular maintenance, including sealcoating and timely repairs, helps prolong driveway life.
Year-Round Maintenance: Protecting Asphalt From Oil and Weather
Maintaining your asphalt throughout all seasons is your best defense against oil stains AND weather damage.
Your Seasonal Action Plan
- Spring inspections catch problems before they worsen dramatically
- Summer heat accelerates oil penetration into your pavement
- Winter freeze-thaw cycles destroy weakened asphalt from oil damage
Act fast on fresh spills. Use cat litter or baking soda immediately. Then apply degreaser and hot-water pressure washer at 3000 PSI.
Smart Preventive Maintenance Wins
Schedule crack sealing annually. Patch before cracks exceed 1/4 inch. Apply sealcoat every 2–4 years for protection.
This approach stops water entry completely. It prevents freeze-thaw damage that destroys oil-compromised areas. You’ll avoid expensive repairs later. Your investment pays dividends year after year. Nathan’s Paving offers professional sealcoating and free consultations across Central PA to help protect your pavement.
Frequently Asked Questions
How to Get Rid of Oil Stains on Asphalt?
Set-in stains? You’ll need professional help. Consider hiring experts for deep damage prevention.
Are Oil Stains on Asphalt Permanent?
Fresh oil? You’ve got a fighting chance. Quick action with degreasers stops chemical breakdown before oil penetration starts.
But here’s the catch:
Wait 6–12 months? That’s when serious trouble hits. Oil causes chemical breakdown of your asphalt binder. UV degradation and porosity variation make stain oxidation permanent. You’ll need milling or replacement then.
Bottom line: Act fast or accept permanence.
Will Dawn Remove Oil Stains From Asphalt?
Dawn’s surfactant chemistry breaks oil molecules apart. You’re basically tricking grease into mixing with water. Pretty cool, right?
Best results happen when:
- You act FAST (fresh stains respond best)
- You test concentrations first
- You let it sit 10–30 minutes
- You scrub hard with proper application techniques
The catch? Old, set-in stains need stronger degreasers. Dawn won’t fix deep penetration damage.
Post-treatment care matters: Seal afterward to prevent future staining and reduce environmental impact.
Does WD-40 Remove Oil From Tarmac?
The catch? Deep, aged oil won’t budge.
You’ll likely need mechanical scraping plus chemical solvents for stubborn stains.
Consider heat application to soften residue first.
Monitor environmental runoff carefully.
Ultimately, prevention and traffic safety matter most!
Conclusion
You’ve got the roadmap now—don’t let oil stains become asphalt’s kryptonite. Act fast on fresh spills. Seal coat like you’re building a fortress. Stay vigilant with maintenance. Think of your pavement as a living thing that needs protection. You’re not just fixing driveways; you’re protecting your investment. Small actions today prevent expensive disasters tomorrow. You’ve got this!