DIY works for small cracks under 1/4 inch. Spend $20–$100 and you’re done. Grab a wire brush, cold-pour filler, and tack coat. But stop right there if you see alligator cracking, deep potholes, or patches returning after freezes. Those red flags mean base failure. Professionals use hot asphalt that bonds better and costs $250–$800 per pothole or $3–$7 per square foot for resurfacing. Skip the DIY headaches on big jobs. Stick around to uncover exactly which repairs professionals guarantee and why they actually save you money long-term.
Key Takeaways
- DIY repairs work for small cracks under 1/4 inch and tiny potholes costing under $100 total in materials.
- Call professionals for alligator cracking, deep potholes, cracks wider than 1/4 inch, or recurring damage after freezes.
- Professional hot-applied asphalt bonds better and flexes more effectively than cold-pour DIY patches for durability.
- Projects exceeding 100 square feet warrant professional service to address underlying drainage and subgrade issues properly.
- Professional resurfacing costs $3–$7 per square foot; individual pothole repairs range $250–$800 depending on severity.
Small Cracks and Potholes: What You Can Handle Yourself
You can tackle small asphalt damage yourself. Save serious money doing it.
Linear Cracks Under 1/4 Inch
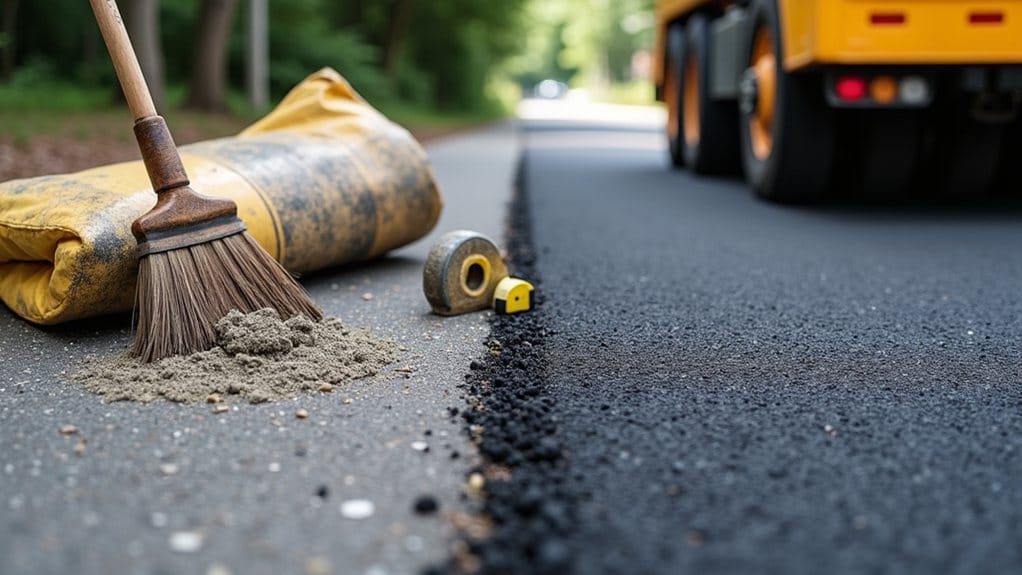
Grab a wire brush and blower. Remove all debris and vegetation first.
Then squeeze cold-pour crack filler directly into the gap. Materials run just $10–$60 per container. That’s a huge win versus professional costs!
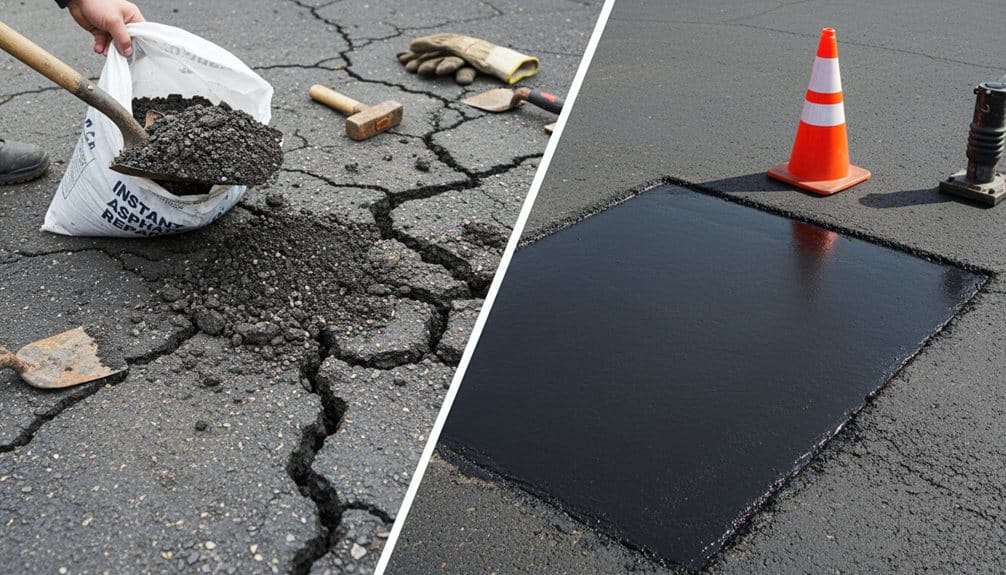
Small Potholes (Few Inches Across)
Here’s your DIY pothole game plan:
- Clean the hole thoroughly
- Apply a tack coat
- Add asphalt patch material in 1–2 inch layers
- Compact each layer firmly
Monitor Your Work
After repairs, watch through freezes and heavy rains.
Reappearance means you should call a professional. Your driveway will tell you if the fix worked!
Professional services can also offer warranties that provide added protection and peace of mind.
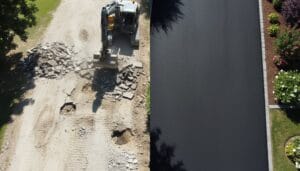
Deep Damage and Structural Issues: When to Call a Professional
While DIY fixes work great for tiny cracks and small potholes, some damage runs way deeper than surface patches can handle.
Watch for these red flags:
- Alligator cracking (interconnected cracks covering 100+ square feet) = base failure
- Deep potholes several inches wide and deep need hot asphalt layers
- Cracks wider than 1/4 inch with vegetation growing through them
- Ponding water reaching your garage or foundation
Structural issues demand professionals because they require heavy equipment and specialized knowledge.
Contractor patching removes failing material properly, applies tack coats, and compacts layers for durability.
Regrading and drainage solutions prevent rapid failure.
Don’t gamble with foundation damage. Call a pro immediately when you spot base failure signs!
We offer free estimates to help you determine the right repair approach.
DIY vs. Hiring: What You’ll Actually Pay
Let’s dig into what you’ll actually spend.
Small Cracks? DIY Wins Big
You’ll spend $20–$50 per bag on materials cost for DIY patching. Add a tack coat ($20–$40 per gallon). One or two small cracks? You’re looking at under $100 total. That’s incredibly budget-friendly!
Call a Professional When It Matters
Professional cost jumps to $250–$800 per pothole. Why? Specialized equipment and skilled labor drive expenses up fast.
Bigger Projects Shift the Equation
Resurfacing runs $3–$7 per square foot professionally. Your 500 sq ft driveway? Expect $1,500–$3,500. DIY materials cost less, but the skill requirement skyrockets.
Sealcoating Reality
Professional sealcoating costs $0.20–$0.50 per square foot. DIY kits run $30–$60 per bucket.
The Bottom Line
Projects exceeding 100 square feet? Call a professional. You’ll save headaches and money long-term.
Get a fast, free quote today to compare options and find the best approach for your project, including detailed estimates tailored to your needs.
Why Professional Repairs Last Longer (And Why That Matters)
Because professionals use hot-applied, rubberized asphalt instead of cold patches, their repairs actually *stick*.
The Real Difference
You’re getting materials that flex and bond. Cold patches? They crack and pop out within months.
Prep Changes Everything
Professionals route out damage and clean edges with high-pressure air. They apply tack coat to lock everything down. Your DIY patch skips this. It fails because of it.
Compaction Counts
Contractors compact in 1–2 inch lifts using plate compactors. This eliminates voids that cause settling and premature potholes.
They Fix Root Problems
Your patch returns because of soft subgrade or standing water underneath. Professionals diagnose and repair underlying drainage issues that simple surface fixes miss.
The Guarantee Matters
Professional repairs come with workmanship guarantees (typically one year). Their freeze-thaw resistance beats DIY attempts by a huge margin.
You’re paying for *permanence*, not just a quick cover-up.
We follow industry best practices and local regulations to ensure your repairs last.
Getting the Most Out of Your Patch: Preparation and Expectations
Next, you’ll apply the tack coat. This bond layer makes new asphalt stick to your existing asphalt surface. Follow product instructions carefully. Wait until it’s tacky before placing filler material.
Then compact in 1–2 inch lifts using a hand tamper. Overfill slightly for settlement. Level it out perfectly.
| Task | Tools | Time |
|---|---|---|
| Clean crack | Wire brush | 30 min |
| Apply tack coat | Applicator | 15 min |
| Apply filler | Trowel | 20 min |
| Compact | Tamper | 25 min |
| Cure | None | 24 hrs |
Here’s the real talk: For patches over 100 square feet, call a contractor. Maintenance and timely repairs prevent bigger disasters! Nathan’s Paving is fully insured and offers professional asphalt services to ensure durable, long-lasting repairs.
Frequently Asked Questions
What Safety Hazards Should I Be Aware of When Doing Asphalt Patching Work?
Hot Surfaces & Equipment
You’re dealing with asphalt reaching 300+ degrees. Wear heat-resistant gloves always. Heavy equipment operates nearby. Stay alert.
Fumes & Respiratory Risks
Toxic fumes from sealers damage lungs. Wear respirators in all conditions.
Trip & Traffic Dangers
Uneven ground causes falls. Set up traffic control signs immediately. Wear bright vests so drivers see you.
Other Critical Protections
Eye protection shields from debris. Keep flammable materials away from heat sources. Never work in confined spaces alone.
How Can I Tell if My Asphalt Damage Is Caused by Drainage Problems Underneath?
Your asphalt’s crying out for help! Look for these telltale signs:
Red Flags:
- Sinking spots that feel soft underfoot
- Standing water pooling after rain
- Vegetation growth erupting through cracks
- Erosion channels cutting like rivers
- Edge crumbling along pavement borders
- Crack patterning spreading like spider webs
- Soft subbase beneath surface layers
- Soil washout visible at edges
These symptoms scream drainage failure underneath.
You’re witnessing water destruction firsthand!
What’s the Best Time of Year to Patch Asphalt for Optimal Results?
Why these seasons rock:
- Warm days help sealant cure properly
- Dry conditions prevent water damage
- Temperature stays consistent
Your ideal window:
Early summer and mid-summer? Perfect! You’re getting 70°F+ temperatures and minimal rain.
Late summer and early fall work too. Just move fast before cold hits.
Pro tip: Skip winter patching entirely. Cold breaks your repairs!
Can I Patch Asphalt in Cold or Wet Weather Conditions Successfully?
The Reality Check:
Many winter patches fail within one year if conditions aren’t ideal.
Cold Weather Challenges:
You’ll struggle with cold patching below 50°F. Temperature limits matter big time. Moisture barriers become your best friend. Freeze-thaw cycles destroy weak patches fast.
Wet Conditions? Nope.
Skip wet mixing entirely. Surface preparation requires bone-dry asphalt. Winter additives help slightly. But honestly? Curing times triple in cold weather.
Bottom Line:
Wait for spring. Really.
How Often Should I Inspect My Asphalt to Catch Damage Early?
You’ve got to inspect regularly! Here’s your game plan:
Weekly checks catch fresh damage fast. Monthly inspections reveal emerging problem areas. Seasonal reviews prepare you for weather shifts. Run post-storm assessments immediately after bad weather hits. Annual surveys give you the big picture. Track cracks and monitor wear patterns. Heavy traffic-based inspections spot deterioration quickly. Stay vigilant. Early detection saves serious cash!
Conclusion
You’ve got the knowledge now. Here’s the reality: DIY patches often fail within two years if not done correctly. Small cracks? You can handle them. Big structural damage? Call the pros. You’ll save money short-term doing it yourself, but professionals deliver lasting results. Your driveway’s longevity depends on making smart choices today. Don’t let small problems become expensive nightmares tomorrow!