Winter hammers your driveway through freeze-thaw cycles, salt chemicals, and standing water. You’ll spot hairline cracks (under 1/8″), moderate cracks (1/8″–1/4″), and serious damage (over 1/4″) requiring different fixes.
Small cracks need pourable filler; wider ones demand cold patch or professional help. Clean thoroughly, let surfaces dry 24–48 hours, then repair strategically.
Spring sealcoating every 2–3 years protects against repeat damage. Timing matters enormously—rush repairs in freezing temps and they’ll fail. Stick around to learn exactly when and how to tackle each damage type.
Key Takeaways
- Inspect cracks in spring; hairline cracks (<1/8″) need monitoring, moderate (1/8″–1/4″) suit DIY filler, larger cracks require professionals.
- Clean debris, salt residue, and oil thoroughly, then allow 24–48 hours drying before attempting any repairs.
- Use cold patch for winter repairs in 1–2″ lifts, plan hot-mix replacement in spring for durability.
- Address drainage issues immediately by regrading low spots and installing French drains to prevent freeze-thaw damage recurrence.
- Apply sealcoat every 2–3 years in late spring through early fall to protect against moisture and chemical deterioration.
Common Winter Driveway Damage Types
When temperatures drop, your driveway faces a genuine threat.
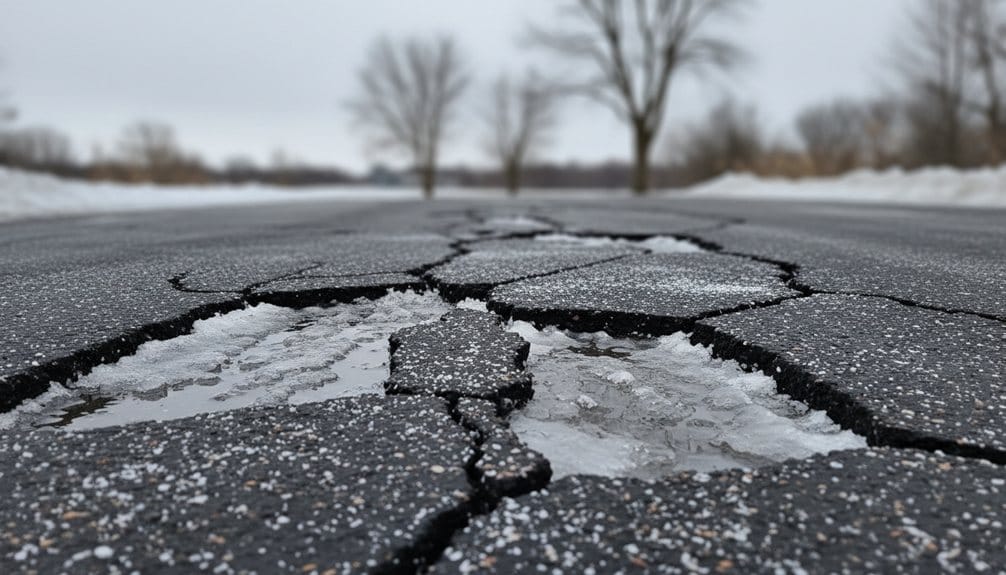
Freeze-Thaw Cycles: The Silent Destroyer
Water seeps into tiny driveway cracks. When it freezes, it expands dramatically. Your cracks widen. Then they become potholes. This cycle repeats all winter long!
Standing Water Problems
Pooled meltwater weakens your pavement base. Poor drainage causes settling and heaving. Spring reveals sunken sections everywhere.
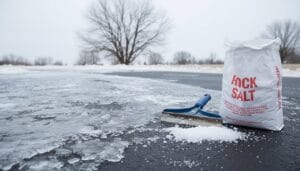
Chemical Assault from Rock Salt
De-icers weaken asphalt binders chemically. Surface pitting appears fast. Aggregate literally falls away. Your driveway deteriorates rapidly.
Mechanical Damage
Snowplow blades chip edges severely. Studded tires scratch surfaces. Metal shovels create loose debris. Moisture rushes in through damaged areas.
The Bottom Line
Winter’s a perfect storm for driveways. Multiple damage types happen simultaneously. Early intervention saves money long-term. Regular maintenance can extend driveway lifespan and prevent costly repairs.
Assessing Crack Severity for DIY vs. Professional Repair
Now that you’ve identified winter’s damage types, it’s time to get specific. Cracks in your driveway come in different sizes. Each size tells you something important about repair needs.
Your Crack Size Guide
| Crack Width | What It Means | Your Action |
|---|---|---|
| Under 1/8″ | Hairline cracks only | Leave alone or DIY fill |
| 1/8″–1/4″ | Moderate damage | DIY-fillable with tube filler |
| Over 1/4″ | Serious issue | Professional assessment needed |
| Deep full-slab | Structural problem | Hire contractor immediately |
| Growing 1/8″ yearly | Worsening pattern | Call pro after freeze-thaw cycles |
Monitor Your Cracks
Mark cracks with tape. Remeasure after freeze-thaw cycles hit hard. Growing cracks demand professional help fast. Additionally, keep in mind that routine maintenance can significantly extend the lifespan of your asphalt surfaces.
Red Flags
Watch for multiple cracks or vertical offsets. Sinking areas around cracks signal foundation problems. These always need professional contractors.
Cleaning and Preparing Surfaces Before Repair
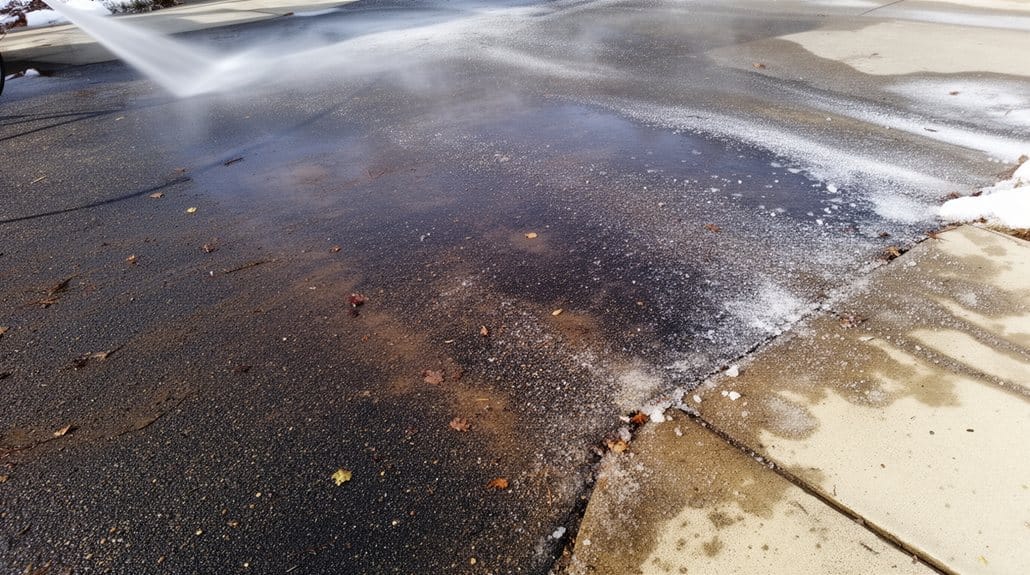
Grab your sweep or pressure washer and attack that grime. Remove dirt, loose aggregate, oil, and salt residue completely. This step matters huge—fillers won’t bond to dirty surfaces! Additionally, using high-quality materials for repairs ensures durability and longevity.
Crack Care
Use a wire brush and narrow screwdriver to clear cracks thoroughly. Compressed air works great too. Remove vegetation, grit, and loose particles. Cracks under 1/4 inch? You’ve got this!
Degreasing Mission
De-grease oil stains with cat litter first. Then use commercial cleaners or hot water. Freeze-thaw cycles create moisture problems—dry everything completely before repair.
Wait It Out
Allow 24–48 hours for full drying. Temperatures above 40°F help crack filler and sealers cure properly. Patience wins!
Asphalt Crack Filling and Patching Techniques
Once your driveway’s clean and dry, it’s time to fill those cracks!
Small cracks need quick action. For cracks under 1/4 inch wide, use pourable asphalt filler. It stays flexible through freeze-thaw cycles. This prevents water from sneaking in and causing damage.
Bigger cracks demand more work. Remove all loose material first. Apply asphalt cement adhesive to the sides. Then fill with polymer-modified patching compound. Compact it thoroughly!
| Crack Size | Best Method |
|---|---|
| Under 1/4 inch | Pourable filler |
| 1/4–1/2 inch | Hot or cold patch |
| Over 1/2 inch | Professional repair |
| Winter damage | Cold patching |
| Spring maintenance | Hot mix replacement |
Winter pothole fixes? Use cold patch asphalt. Layer it in 1–2 inch lifts. Tamp down hard. Plan to replace it with hot mix when spring arrives! Additionally, regular seal coating can significantly extend the life of your asphalt and prevent further damage.
Cold Patch Solutions for Winter Pothole Repairs
Pro tip: Choose high-quality, pre-mixed cold patch labeled for winter use.
Avoid rock salt near fresh patches.
Inadequate edge preparation shortens repair life considerably. Additionally, using durable, top-grade materials for repairs can significantly enhance longevity and performance.
Concrete Driveway Repair and Resurfacing Methods
Wire brush and pressure wash thoroughly. Let it dry completely. This step matters—a lot. Bonding agents won’t stick to dirty surfaces. Quality paving ensures a durable and long-lasting repair.
Tackle Small Cracks
Small cracks need flexible fillers. Use polyurethane or silicone for hairline to 1/4″ gaps. Wider cracks? Chisel out loose edges and patch with polymer-modified concrete.
Apply Concrete Resurfacer
Mix to pancake-batter consistency. Apply thin coats (1/8″–1/2″) with a squeegee. Cure between coats. Add a second skim coat for uniformity.
Curing and Protect Matters
Protect your concrete driveway for 24–48 hours in warm, dry conditions. Then seal it with siloxane or acrylic sealer. Reapply every 2–3 years. Your driveway’ll thank you!
Winter Repair Challenges and Limitations
Here’s what makes winter repair so challenging:
- Moisture is your enemy — Ice and standing water prevent bonding. Freeze-thaw cycles reopen freshly filled cracks within weeks. You need completely dry surfaces.
- Cold patches settle fast — Winter repairs compact poorly. Expect additional settling and reduced strength until spring arrives.
- De-icing chemicals destroy everything — Salt accelerates surface deterioration. It degrades binders and reduces repair lifespan dramatically.
The bottom line? Contractors defer major resurfacing until consistent warm, dry conditions return (above 50°F). Limited daylight and variable temperatures increase labor costs markedly.
Wait for spring for permanent fixes!
Sealant Application Timing and Best Practices
You’ll want to apply sealant every 2–3 years. Pick late spring through early fall. Temperatures must stay between 50–85°F consistently. Your sealant won’t cure properly otherwise!
Prep Work Matters
Use a pressure washer to clean everything. Remove oil, debris, and loose aggregate thoroughly. Let it dry 24–48 hours minimum. Fill cracks and repair potholes first!
Application Technique
Apply two thin coats with a squeegee. Follow manufacturer’s dry time between coats. Avoid direct sun and wind during application.
Cure Time
Wait at least 24–48 hours before foot traffic. Hold off 48–72 hours before parking vehicles. Schedule when warm, dry days are forecast. This protects your driveway for years! Additionally, proper sealcoating application can extend asphalt life by 30-50%, making it a wise investment for your driveway.
Preventative Measures to Reduce Winter Damage
Skip metal shovels. Use plastic-blade shovels instead. They prevent gouging that turns into massive winter destruction. Additionally, maintaining a well-sealed driveway can greatly enhance its durability and resistance to fading and damage. Smart prevention saves thousands in repairs later!
Post-Winter Follow-Up and Spring Maintenance
Winter’s over—but your driveway’s battle isn’t finished yet!
Inspect the entire driveway in spring for cracks, potholes, and heaved slabs. Cracks under 1/4” you can DIY-fill. Larger ones? Call a pro.
Remove winter debris through pressure washing or sweeping. Let it dry completely—24–48 hours minimum. This guarantees repairs stick properly.
Replace temporary patches with hot-mix asphalt once temperatures hit 50°F consistently.
Apply a concrete or asphalt sealcoat every 2–3 years after spring repairs. This protects against moisture and chemicals.
Check and correct drainage issues immediately. Regrade low spots. Clear gutters. Install French drains if needed. Pooling snowmelt causes repeat freeze-thaw damage.
Schedule sealing during warm, dry forecasts. Your proactive spring work prevents expensive summer problems! Additionally, regular maintenance can significantly prolong the life of your driveway, ensuring it remains in excellent condition for years to come.
Conclusion
You’re now ready to tackle winter driveway damage like a pro! Here’s the reality: 80% of driveway damage happens between November and March**. That’s huge! By acting fast on cracks and following our repair tips, you’ll save thousands. Don’t wait for spring—start prevention now. Your driveway will thank you. Keep it sealed**. Keep it strong. You’ve totally got the knowledge!