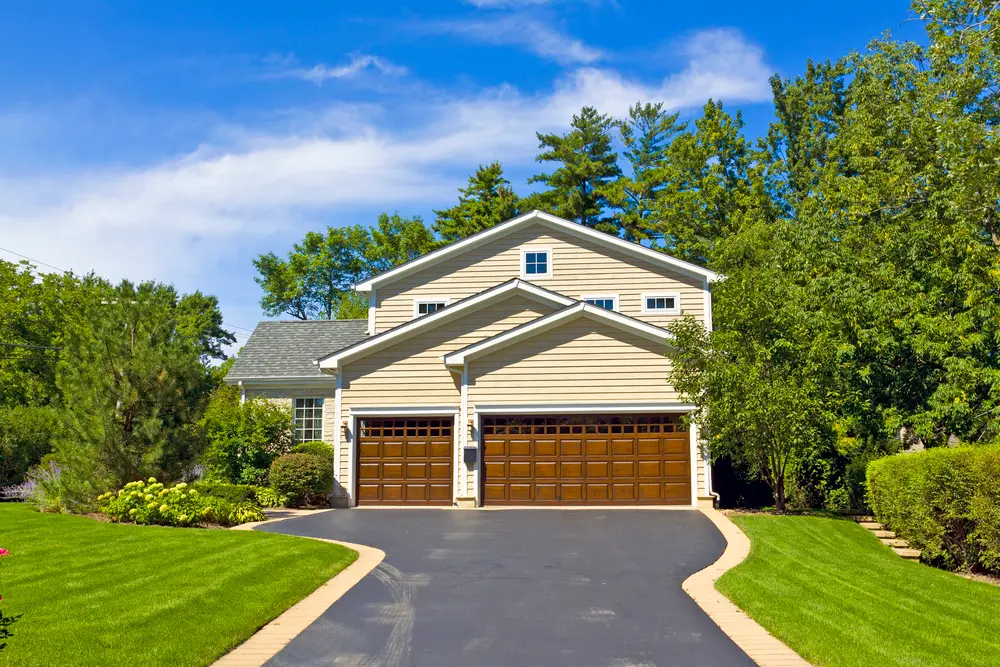
Are you looking to maintain the longevity and appearance of your residential sealcoating? Look no further! In this guide, we will provide you with 15 essential tips for residential sealcoating maintenance.
Imagine this scenario: You recently had your driveway sealcoated, but you notice that it’s already starting to crack and fade. Don’t worry, we’ve got you covered. From avoiding overspray to applying a thick and even coat, we will walk you through all the dos and don’ts of sealcoating maintenance.
By following these tips, you can ensure that your sealcoating job stays in pristine condition for years to come. So let’s dive in and learn how to keep your sealcoating looking fresh and protected!
Key Takeaways
- Regularly inspect and maintain the sealcoated area
- Thoroughly clean the surface before sealcoating
- Repair any cracks or potholes promptly
- Follow manufacturer’s recommendations and allow proper curing time
Why Sealcoating Is Important
When it comes to maintaining your residential sealcoating, it’s important to understand why sealcoating is crucial for the longevity and durability of your asphalt surface.
Sealcoating acts as a protective layer for your asphalt, shielding it from the damaging effects of the sun and traffic. By applying a solid and even coat of sealcoat, you can make sure that your asphalt surface is well-protected and less likely to wear out quickly.
Additionally, sealcoating helps to prevent water penetration, which can lead to cracks and deterioration of the asphalt. By regularly sealcoating your residential driveway or parking lot, you can save money in the long run by reducing the need for extensive repairs and replacements.
Choosing the Right Sealcoat
To ensure proper residential sealcoating maintenance, prioritize selecting the right sealcoat for your asphalt surface. Choosing the right sealcoat is crucial for maximizing the longevity and appearance of your driveway.
Here are some key factors to consider when selecting your sealcoat:
- Asphalt Surface: Determine the condition of your asphalt surface before choosing a sealcoat. Different sealcoats are designed for specific types of surfaces, such as new asphalt or older, weathered asphalt.
- Pressure Washer: If your asphalt surface is dirty or has debris, consider using a pressure washer to clean it before applying the sealcoat. A clean surface ensures better adhesion and a more durable seal.
- Spray Application: Decide whether you prefer a spray application or hand application for your sealcoat. Spray application is quicker and more efficient, but hand application allows for better control and avoids overspraying.
Preparing the Surface
To properly prepare the surface for sealcoating, you should start by inspecting the condition of your asphalt and determining any necessary repairs. Look for cracks, potholes, or areas of significant damage that may require patching before applying the sealcoat. Asphalt Kingdom, a leading provider of sealcoating equipment and supplies, recommends filling any cracks larger than a quarter-inch with a crack filler. For potholes or larger areas of damage, it is best to use a patching compound. Once the repairs are complete, make sure to clean the surface thoroughly. Remove any dirt, debris, or grass along the edges of the asphalt to ensure a smooth and even application. By properly preparing the surface, you can maximize the effectiveness and longevity of your sealcoating project.
| Step | Description |
|---|---|
| 1 | Inspect the condition of the asphalt and determine necessary repairs |
| 2 | Fill cracks larger than a quarter-inch with crack filler |
| 3 | Patch potholes or larger areas of damage with a patching compound |
| 4 | Clean the surface thoroughly, removing dirt, debris, and grass along the edges of the asphalt |
Cleaning and Clearing the Area
To ensure a smooth and even application of the sealcoat, it’s important to thoroughly clean and clear the area of any dirt, debris, or grass along the edges of the asphalt. This will help the sealcoat adhere properly and make it last longer. Here are some steps you can take to clean and clear the area effectively:
- Sweep the entire surface of the asphalt to remove loose dirt and debris.
- Use a pressure washer or hose to remove any stubborn stains or dirt.
- Pay special attention to areas with oil or grease stains.
- Use a degreaser if necessary.
Trim any grass or vegetation along the edges of the asphalt to ensure a clean and neat appearance. Repair any cracks or potholes before applying the sealcoat.
Repairing Cracks and Potholes
To effectively repair cracks and potholes in your residential sealcoating, start by using a high-quality asphalt patching material.
Filling cracks and patching potholes are essential for maintaining the integrity of your driveway or parking lot. Cracks can allow water to seep into the underlying layers of asphalt, leading to further damage and deterioration. Potholes can be hazardous and cause damage to vehicles.
Surface repairs should be done as soon as possible to prevent these issues from worsening. When filling cracks, make sure to clean the area thoroughly and apply the patching material according to the manufacturer’s instructions.
For potholes, remove any loose debris and fill them with the patching material, compacting it to ensure a smooth and level surface.
Regularly inspecting and repairing cracks and potholes will help prolong the lifespan of your sealcoating and maintain its appearance.
Applying the Sealcoat
For a successful application of the sealcoat, ensure that you have prepared the surface properly. This will help you achieve a smooth and even sealcoat finish. Here are some sealcoat application techniques to keep in mind:
- Start by cleaning the surface thoroughly, removing any dirt, debris, or vegetation.
- Fill in any cracks or potholes before applying the sealcoat to ensure a smooth surface.
- Use a squeegee or brush to apply the sealcoat evenly, working in small sections at a time.
- Avoid applying the sealcoat too thickly, as this can lead to cracking and uneven drying.
- Be mindful of the weather conditions, as extreme heat or cold can affect the drying process.
To avoid common mistakes during sealcoating, remember:
- Don’t overapply the sealcoat, as this can cause pooling and a blotchy appearance.
- Avoid applying the sealcoat too soon after filling cracks, as it needs time to cure properly.
Proper Curing Time
Allow sufficient time for curing to ensure the best results and longevity of your residential sealcoating. Proper curing time management is vital to avoid common mistakes and achieve optimal performance. Rushing the curing process can lead to premature wear and a shorter lifespan for the sealcoat.
It’s crucial to follow the manufacturer’s recommendations for the specific product you’re using, as different sealcoatings may require different curing times. Typically, it’s recommended to allow at least 24 to 48 hours for the sealcoat to cure before subjecting it to traffic or weather conditions.
During this time, it’s essential to avoid any foot or vehicle traffic on the newly applied sealcoat to prevent damage. By allowing sufficient curing time, you can ensure that your sealcoating is properly bonded to the asphalt surface, providing maximum protection against traffic, weather, and UV exposure.
Regular Inspections and Maintenance
When conducting regular inspections and maintenance for your residential sealcoating, it’s important to pay attention to any signs of damage or wear. To ensure the longevity and effectiveness of your sealcoating, here are some key points to consider:
Inspection frequency:
- Regularly inspect the sealcoated area to identify any cracks, potholes, or areas of deterioration.
- Schedule inspections at least once a year, or more frequently in areas with harsh climate conditions.
Surface preparation:
- Before applying sealcoating, thoroughly clean the surface to remove dirt, debris, and any loose asphalt.
- Repair any cracks or potholes before sealcoating to prevent further damage.
Equipment maintenance:
- Regularly inspect and maintain your sealcoating equipment to ensure optimal performance.
- Clean and calibrate the equipment as recommended by the manufacturer to avoid uneven application.
Cleaning and Sweeping
To keep your sealcoating in optimal condition, regularly clean and sweep the surface to remove dirt, debris, and other potential contaminants. Sweeping techniques are essential to ensure a clean and even surface before sealcoating. Use a broom or a power sweeper to remove loose dirt, leaves, and debris. Pay close attention to corners, edges, and cracks where dirt can accumulate.
After sweeping, inspect the surface for any remaining dirt or stains. For stubborn stains, use a mild detergent and a stiff brush to scrub the area. Rinse thoroughly with water and allow the surface to dry completely before proceeding with the sealcoating process.
Handling Oil and Chemical Spills
How can you effectively handle oil and chemical spills on your sealcoated surface? It’s important to take immediate action to prevent contamination and minimize the environmental impact of spills. Here are some tips to help you handle oil and chemical spills effectively:
Spill containment:
- Place absorbent materials, such as kitty litter or sand, on the spill to absorb the liquid.
- Use a broom or shovel to scoop up the absorbed material and dispose of it properly.
Preventing contamination:
- Avoid washing spills directly into storm drains or nearby water bodies.
- Use a spill kit or absorbent pads to quickly clean up small spills before they spread.
Preventing Water Damage
Take immediate action to prevent water damage on your sealcoated surface by addressing any areas of concern promptly.
To prevent water damage, consider implementing drainage solutions to redirect water away from your sealcoated surface. This can include installing French drains, catch basins, or grading the area to promote proper water flow.
Additionally, utilize waterproofing techniques to create a barrier against water infiltration. This can involve applying a water-resistant sealant or using a waterproof membrane under the sealcoat.
Lastly, regular landscape maintenance is crucial in preventing water damage. Keep vegetation trimmed away from the sealcoated surface to prevent roots from causing cracks or lifting the sealcoat. Additionally, ensure that gutters and downspouts are clear of debris to prevent water from pooling near the surface.
Protecting From UV Rays
To shield your sealcoated surface from the damaging effects of UV rays, follow these tips for protecting it against fading and deterioration:
- Apply a thick and even coat of sealant: A well-applied sealant acts as a protective barrier, preventing UV rays from penetrating the surface of the asphalt. Make sure to apply the sealant evenly to ensure maximum coverage.
- Consider a second coat of sealant: Adding a second coat of sealant provides an extra layer of protection against UV rays. This can significantly enhance the durability and longevity of the sealcoating.
- Seek professional guidance and quality sealants: Professional sealcoating services can offer valuable advice on the best protective measures against UV damage. Additionally, using high-quality sealants ensures better resistance to UV rays, prolonging the life of the sealcoating.
Dealing With Weather Extremes
To protect your sealcoated surface from weather extremes, proper maintenance is crucial. Dealing with extreme temperatures, such as freezing winters and scorching summers, can take a toll on your sealcoating.
During the winter, it’s important to perform regular maintenance to prevent cracks and potholes from forming due to freezing and thawing cycles. This includes promptly repairing any damage and keeping the surface clean from snow and ice.
In the summer, the sun’s UV rays can cause the sealcoat to deteriorate and fade. To prevent sun damage, it’s recommended to apply a UV-resistant sealcoat and regularly inspect and reapply as needed.
Sealcoating Aftercare Tips
Regularly inspect and maintain your sealcoated surface to ensure its longevity and effectiveness. Here are some aftercare tips to help you keep your sealcoated surface in top condition:
- Clean the surface regularly: Sweep away debris and wash the surface with a mild detergent and water to remove stains and dirt buildup.
- Avoid heavy traffic: Limit heavy vehicle traffic on the sealcoated surface for at least 48 hours after application to allow the sealcoat to fully cure.
- Be cautious with sealcoating equipment: If using DIY sealcoating equipment, make sure to follow the manufacturer’s instructions carefully to avoid common sealcoating mistakes.
- Repair cracks promptly: Fill in any cracks or potholes in your sealcoated surface as soon as you notice them to prevent further damage.
- Regularly reapply sealcoat: Depending on the level of wear and tear, you may need to reapply the sealcoat every 2-3 years to maintain its protective properties.
Hiring a Professional Sealcoating Service
When hiring a professional sealcoating service, it is crucial to consider their expertise and reputation to ensure the best results for your residential surface. There are several factors to consider when making this decision. Firstly, you should assess the benefits of DIY sealcoating versus hiring a professional. While DIY may save you money upfront, it is important to note that professionals have the necessary equipment, knowledge, and experience to deliver a high-quality job that will last longer. Additionally, it is essential to look for signs of a reputable sealcoating company. These signs include a solid reputation, positive customer reviews, and a commitment to using high-quality materials. By taking the time to research and select a reputable sealcoating service, you can ensure a durable and long-lasting sealcoat for your residential surface.
| Factors to Consider When Hiring a Sealcoating Service | Benefits of DIY Sealcoating | Signs of a Reputable Sealcoating Company |
|---|---|---|
| Expertise and Experience | Cost Savings | Solid Reputation |
| Quality Materials and Equipment | Convenience | Positive Customer Reviews |
| Longevity of Results | Knowledge and Skill | Commitment to Excellence |
Conclusion
In conclusion, proper sealcoating maintenance is crucial for protecting residential driveways and ensuring their longevity. By following the 15 tips provided by Asphalt Kingdom, homeowners can effectively maintain their sealcoating and avoid costly repairs in the future.
Did you know that sealcoating can extend the life of asphalt by up to 300%? So, take the necessary steps to preserve your driveway and enjoy a durable and attractive surface for years to come.